Showing posts with label DIY. Show all posts

Friday, June 14, 2013

How To Thrift Like a Pro

Today I am going to share some tips on how to conduct a successful thrifting shopping trip. I am NO stranger to the world of thrifting and I used to frequent second-hand shops, garage sales, markets, and estate sales where I thought I might have a good chance to pick up a unique item. However, I was an amateur and it is only since moving to South Korea that I have blossomed into the thrifting beast that I am now. Oh, the hours and hours that I have spent sorting through piles and piles of clothing is enough to send most people running, but I have enjoyed EVERY second of it and I even opened my own Etsy vintage shop, Seoul Sold, to prove it!

I am excited to share what I have learned and I hope that maybe one of two of my tips will make your next thrifting adventure more enjoyable.

Here is what you NEED and this is non-negotiable. If you listen to me I can make sure that you have EXACTLY what you need to be happy and productive while out scouring the secondhand haunts.

Bag
A big 'ol bag and the bigger the better, but keep in mind that when I say big I don't mean something that is cumbersome for you to carry. Think about your preferences, do you like backpacks, messengers, or an over-sized purse? Whatever you choose make sure that it is light-weight, and doesn't have a lot of straps or zippers to get in the way because we want to be able to jam as much clothing as possible into it with the least effort. Also an easily identifiable bag is good for keeping track of it if you set it down in the mountains of clothing so choose a brightly colored bag. Plus, if you are able to quickly see what you have at a glance you will be able to reassess your shopping strategy easily. Because no one really NEEDS a bag full of polka dot dresses just because you found 5 in a row!

I have a favorite Aerie tote that is my go-to bag when I hit the vintage markets. My aerie bag hits all the right notes being light-weight, easily accessible, I love how easy it is to carry, and I  won't lose track of it with it's bright pink pattern.


All of this is in that Aerie bag! 6 tops and 7 dresses, plus a skirt that isn't pictured!
Cash
I know that a debit card is amazing and we get so used to using them on a daily basis that when we go shopping we  usually don't think to bring cash, but a thrifting trip is different from a regular shopping outing. You aren't going to the mall and your card is useless if whomever you are buying from doesn't have the means to process a card payment. Cash is king in the world of thrifting and you can usually get a discount if you are buying multiple items. ALSO, cash is critical for budgeting, if you take out a set amount of money for your trip then when all the cash is gone you are done! Only carrying cash to thrift with helps you pace yourself and makes you keep an eye out for those one-of-a-kind items. No buyer's remorse for you, hooray!   

Tape Measure
A tape measure is your best friend when you are on a serious thrifting mission! Stopping to try things on can only slow you down and it tires you out a lot faster than if you are able to just measure the garment and make a quick informed decision. Also, you may not be able to try it on if you are at a market or estate sale so make sure to ALWAYS have your tape measure on hand.

Snacks/Water
Snacks, you need them. I can't count the number of times that I have been finding amazing pieces only to have my stomach start to growl and yell at me making it pretty much impossible for me to focus until I ate. Pack a snack that is easily eaten without having to touch it directly because no one wants dirty hands on their food. I usually bring along a good granola or protein bar to tide me over until I'm shopped out.

Don't forget your water! Staying hydrated is another great way to stay focused AND refreshed. You will be able to shop for longer no matter the circumstances if you make sure that you have a water supply on hand so grab your favorite water bottle for your next trip.

Comfortable clothing/Walking shoes
You are going to be spending a lot of time on your feet so don't wear any footwear that you won't be able to comfortably walk, climb, and lug your vintage finds around in. Yes, I've climbed a mountain of clothing and lived to tell the tale! Also dress in layers if you aren't sure how the weather will be because you can always take off a layer and keep on trucking if you have to.

My last and MOST important tip: Don't get discouraged! You won't always find amazing things at great prices when you are thrifting because there really is no rhyme or reason to it. Some days you are lucky and others you strike out a lot, but can pat yourself on the back for all of the walking that you did! Yay for being active in any way possible. ;) You will encounter piles of clothing, walk till your feet fall off, and probably sneeze your head off thrifting, but it is so worth it when you find an amazing item!

My friend Seung-Wan's victory yell as she finds the perfect dress for summer.
Here are a few shots of what a normal trip the vintage markets looks like for me. I have no idea how I manage to FIND anything in all of this, but it is so much fun!
A look at what I climb, dig, and wander through in the quest for vintage items.
Staying positive as I dig through a massive bag of dresses.
I hope that your next thrifting adventure is full of awesome loot and if you haven't tried out second-hand shopping I hope you do! Finding a one-of-a-kind item is thrilling and you'll love knowing that you won't see ANYONE else with it.

Make sure to swing by my vintage shop for some great items and let me know what you think. 


Find my shop, here.

Happy thrifting!


Tuesday, June 4, 2013

Healthy Chia Seed Pudding//New Blog Name

Today I'll be sharing a couple of things with you and one of them is a delicious recipe for chia seed pudding! Yes, you heard me right, chia seed!

You are probably thinking this, right?

Isn't this little guy adorable?! Let's eat it!
Yes, the chia pet that we grew up loving is indeed made up of the SAME chia seed that I'll be showing you how to turn into a delicious pudding. Salvia Hispanica is a little gem of a seed from Mexico/Guatemala, and it's a fiber/good fats power house! It's also a really great ingredient to keep around because of it's ability to turn into a gel, which can be substituted for fat in some recipes and can act as a thickener. I'll mix up some chia seeds and water to get the right consistency when I make protein bars and want to skip adding any extra stuff like syrup.

On to the recipe, which I can't take credit for because the amazing Gina @Skinnytaste is where I found it! Find the original recipe, here. I LOVE YOU, GINA!

Ingredients:
1 cup Almond Milk (I used original, but you can use the unsweetened vanilla variety as well.)
2 tbs of Chia Seeds

I'm really on a 2 ingredient kick, aren't I? Ok, so this is what we do!

Ok, so take the milk and chia seeds and mix them together. Make sure that you thoroughly mix them together because if you don't the chia seeds will just clump together at the bottom of the milk and you won't get the pudding consistency that we are looking for. I mixed mine with a spoon, let them sit for a few minutes and then gave them a good few shakes, which is why my container is a hot chia seed mess!

Once you've made sure that your seeds and milk are all shook up stick it in the fridge and let it sit for at least 3-4 hours or better yet, OVERNIGHT! It was so awesome waking up to my chia seed pudding for breakfast. :)
Look at how pretty it turned out?! Doesn't it look great? Don't worry the seeds won't be chewy at all since they sat overnight in your milk. I added a few berries because I want a little somethin' extra...and then I got an idea!

Oh yea! If you want to change it up and get a little more color and flavor out of the chia seed pudding then feel free to add 1/2 cup of berries to the mix and blend for a great pudding/smoothie treat! I went with a blueberry, raspberry, cherry mix and I loved the way it turned out. You can even go crazy and pop this in the freezer for half an hour or so to thicken it up to a more yogurt-like consistency. YUM!

Nutrition:
Fat: 8.78g
Fiber:6.55g+2.68
Carbs:11.58g
Protein: 4.68g+.67
WW points+: 3pts

with berries:
Fat:8.78g
Fiber:9.23g
Carbs:21.58g
Protein:5.35g

WW points+: 4pts

Makes one serving.

If you are thinking, "Wow what a great recipe, but where the heck do I find chia seeds?!" Don't worry! Head down to your nearest health food store or co-op grocery store and you can usually find these little babies, but if you come up with nothing then just head to Amazon.com I had NO LUCK tracking these down in Korea and so I just had them shipped from Amazon for a really affordable price. I got 2 pounds sent to me for a grand total of around 26 bucks and that was WITH shipping. If you are not wanting to take the plunge they also sell them in 1 pound bags for around 13 dollars, find it here. AND Bob's Red Mill even sells chia seeds so I bet you could find these at your local supermarket for an affordable price.

Ok, so not only did I want to share the super yumminess of the chia seed with you, but I also wanted to let you all know that I'll be switching blog names pretty dang soon. I'm really excited to make the switch because this blog hasn't been that focused on the shop in a bit, whoops! >.>  I can't help but feel guilty about not just focusing my blogging efforts on the vintage shop and I can't wait to have a blog purely for posting about things I find interesting or want to share. The next post will be purely focused on vintage shopping, I promise!

So, you may remember me saying that I had been having the worst time coming up with a blog name and thankfully I FINALLY DID IT!! When I make the change I'll be going by TheHappyType.com!

I'm a genius, right? Every time I see the blog address which is just waiting for me I want to do a little dance because the name makes me so glad that it came to me.

 Now that I have a sweet name picked out and I know exactly what type of content I'll post, I just have to decide what kind of blog design I want. I am really excited to try and figure out the look that  I want. I'll be gathering up some inspiration for the next step and I can't wait to see what I'll see around Seoul to get my creative thinking going.

I hope you enjoy the healthy pudding recipe and please share how and what motivates you to be your most creative. I'd love to hear how you got your current blog look and the process that you went through. :) Have a wonderful day!


Saturday, June 1, 2013

Healthy Banana Pancakes

Today I wanted to share an amazing recipe that I am in love with! Banana Pancakes, but not just ANY banana pancakes because these particular banana pancakes are made with just two ingredients, and we aren't using a premix!

So get ready and let's make these incredibly healthy and delicious pancakes!


Ingredients:
1 ripe Banana
2 eggs

Peel, chop banana into quarters, and put into mixing bowl. Add eggs to banana and beat until well mixed. I made sure to use my hand blender to make sure that I got it nice and frothy before I added it to my griddle, but you can use a whisk to get the same results. Just make sure that it is blended well and that there aren't too many chunks because you want the bananas to be thoroughly incorporated with the eggs.
Heat your chosen griddle or pan to desired temperature and spray with your favorite cooking spray or use some extra virgin olive oil. I used olive oil and only had to use about a tsp to make sure that my pancakes didn't stick. Cook as you would a normal pancake, but make sure to flip gingerly so you don't break it apart before it's done.
When the pancakes are finished cooking serve and enjoy! I went a step further and added fresh berries and honey for a delicious and filling breakfast! Doesn't this look like a yummy way to start the day?

I can't take credit for this recipe and I found it on one of my all-time favorite fitness blogs, Blogilates. You can find the original recipe post, here, and Cassey even made a great little youtube video to go along with it! Watch her video, here.

Cassey chose to make her pancakes much smaller than mine, but I found that the recipe was able to make 3 normal sized pancakes.

Nutrition:
Fat:10.6
Protein: 13.6
Fiber: 2.8
Carbs:27.7

Weight Watchers points+: 7 pts.

Makes one serving.

ALSO, if you are looking for a great way to get fit and healthy Cassey at Blogilates (pretty much the most amazing fitness blog EVER) is starting off her June on Fire workout today! Cassey produces amazing results, never fails to inspire, and makes working out fun! I always feel like I'm hitting the mat with a best friend when I workout with Cassey using her youtube videos.

Visit Blogilates, here.

Cassey's youtube channel can be found, here.

Let me know how you like the pancakes and if you join up for the June on Fire workout month! I'll be working it out on Blogilates and would love some company!


Sunday, May 26, 2013

BEDM Challenge: Day 26 Adventure Guide!

I am so excited about today's blog post and it isn't just because I'm almost done with the BEDM challenge, although it is pretty awesome that I have managed to stick to posting once every single day this month! Hurray! Day 26's blog prompt:

"Something you read online. Leave a link and discuss, if you'd like."

I was going through some of my favorite blogs when I came across EXACTLY what I wanted to share with everyone. Since moving to South Korea, I have had the great fortune of going on a pretty awesome adventure that I never imagined would happen when I stepped off the plane. I've also come into contact with so many great blog readers who have expressed a great interest in traveling abroad, but have never had the opportunity. So, when I was reading one my new favorite blogs, The Nectar Collective, and came across Melyssa's DIY Guide to Adventure I knew that I had to share it!


Melyssa is a California lady living in Tokyo, Japan and her blog is full of amazing inspiration, DIY's, and wonderful downloads to get you smiling. Since I have found The Nectar Collective, I am always eager to see what new awesome things Melyssa has put up and I am never disappointed with her content.

The DIY Guide to Adventure is a practical guide that will help get you on track if you are rearing to go on an international adventure. Melyssa's guide helps you calculate not only where and when you want to take your trip, but also how a financial timeline should happen to get you there. I know that I wish I had a guide like this when I left home for England when I was 19 years-old and clueless. Take a look at the guide and let me know what you think and don't forget to send Melyssa some love for her wonderful resource!!

I have had travel on the brain lately because of all of the travel planning that I have been doing for my upcoming trip to the....THE PHILIPPINES! Yep, you heard me! How exciting is that? I know that I can't wait for my trip and a lot the questions that Melyssa put in her guide are the very same questions that my husband and I asked ourselves when considering when and where to take a vacation.

A shot of where we will be staying in beautiful Boracay!! I can't WAIT!
 If you could take a trip anywhere in the world where you would go? How long would you stay? And if you have taken a trip that you dreamed about how did it change your perspective?

Find the DIY Guide to Adventure, here.


Thursday, May 2, 2013

BEDM Challenge: Day 2 Let's Model: How to Take Self-Portraits


Here is day 2 of the BEDM challenge! 

I was a bit conflicted when I read the prompt: Educate us on something you know a lot about or are good at. Hmmm....a thousand things ran through my head so I guess that's a good thing? Right? Yay, I'm a woman of many talents! While this challenge was a little tough to pin down it was a great opportunity to share a post that I have been procrastinating about like nobody's business.

How to take self-portraits/How to successfully model clothing


When I opened up my Etsy shop, Seoul Sold, less than a year ago I had absolutely NO idea what to do when it came to showcasing the clothing that I hoped to sell. While I had taken tons of photographs of other people I was lost in the woods on the modeling front and had never been the subject before. I'm not going to lie it was NERVE RACKING to be IN FRONT of the camera and not the photographer. 

There is a sort of power in the anonymity that being the photographer grants you, you are able to see all the perfect angles, make instant adjustments to your camera, give instruction, and can make the most of what light you have available. But what do you do when you are pretty much your own photographer AND model? A model's power is different than a photographer, and is even more potent by the images you can create, but to do this you have to be adaptable. 

First, things first
You'll need:
A tripod
Camera Remote (preferably wireless, don't worry if you can't find a remote, because I take ALL of my photos without one)
A light background
YOU

It's important to have a good background ready to go for your photo shoot. A blank wall works well or if you want some decorations pick something that won't be distracting or interfere with your modeling. For my own uses I picked a room in my house that had decent light exposure with a white wall, and to add some interest to it I added a small string of bunted flags I made. The flags are useful because not only do they add fun to the photo, but they also help me mark my spots! When I look through the camera I usually take note of which flags I can stand between and in front of to get the best light. 
My special little makeshift photo spot!
Know your body, know your face
Having a working knowledge and command of your own body and face are musts and I had to spend some good old fashioned alone time staring in the mirror discovering which angles worked the best for my face and body. Not to mention it was hard work mastering my facial muscles! Just because you think you are giving your best bedroom eyes doesn't mean that is what your face is ACTUALLY doing. I have found that unless you feel your muscle working then you are probably looking flat faced with no emotion. The trick for me has been to OVER react with my muscles because that is where the life is put into my photos. Even when I want to look serene and quiet I have to actively force my face to calm and I must be careful to control my face otherwise I look lifeless. Another point is to make sure that your smile reaches your eyes, like Tyra said SMIZE! Whatever emotion you are trying to convey MUST reach your eyes otherwise you'll look fake and tired.

Lighting, Lighting, Lighting
I cannot stress the importance of natural lighting and the major role that it plays when you are trying to make your photos look polished and put together. Since I have mastered the use of lighting I do absolutely ZERO touch-ups to my photos, which is awesome because I lack the necessary skills to even make a serious attempt at this. The photos below show what a difference in lighting will do with the exact SAME pose in the SAME place.
Marking my spot let me take two separate shots that were almost identical!
Mark your place
When you start to take photos make sure to mark where the best lighting is in the room. Once you have marked the best place to stand then you can cut out a lot of guess work on where you were standing when you achieved lighting heaven. A word of advice is to NOT TAPE if you are going to eventually include your feet in your photos....I did this on tile and I am still trying to scrape up the tape gum. The spots on the floor drive me crazy when I want to photograph my cute shoes, but I'm kind of a perfectionist so that might not get on your nerves quite like it has mine. Marking your place also let's you be more methodical in your poses by letting you go through a series of poses a bit faster. I would suggest maybe putting down a piece of colored cloth or even a coin to help you remember where you were standing. Plus, if you know exactly where you are going to stand then it will cut down on you moving as the timer for your camera goes off which will eliminate the dreaded FUZZY shot! 
Casualties of the fuzzy shot!
Test Shot
Test shots are so IMPORTANT! I can't count the number of times that I didn't test shot and I was so annoyed with myself because I had either put on too much make-up or misunderstood the lighting for what I would be modeling. At the start of each modeling session I like to do a test shot and then adjust the camera settings. Also, I like to do the first shots with no make-up so that I can get a better idea if dramatic make-up will best suit the lighting or if I need to go with a fresher face. Test shots are also great for determining where the shadows will fall during your shoot so that you'll know whether or not to keep your face face east or west, and which position your body should be in to stay out of the shadows. 

The Fun Stuff: MAKE-UP & HAIR
Make-up and hair go along way to making your photo shoot a success and I always end up putting more make-up on when I take photos as opposed to days when I don't. Using more make-up when I take photos goes beyond wanting to look my best and is due to the fact that the extra make-up helps my features pop on camera. I usually snub lipstick in favor of chap stick or a light gloss, but it's a fact that lipstick is the key to helping your lips show up on camera. Extra eye-liner and mascara help create a pulled together look that is based on the drama and polish that made-up eyes grant you. Make-up and hair also let you put your own particular spin on the photo shoot and help give you a vehicle to communicate personality and feeling into your photos, so don't skip this step!

Tell A Story
Telling a story with your photos is very important so that you don't lose your point-of-view during the photo shoot. Sure, a bunch of good looking photos are nice to have, but if they aren't cohesive then they won't communicate to your audience. I know that for a while taking photos was a chore because I always felt confused when it came to what I should be DOING in the photos, but trying to tell a story helped me have a clearer idea of what to DO on camera. For example, when I started doing the photos for this little how-to I decided that I wanted to create a fun beach type look and so I used that as inspiration and grabbed a hat and bag to add to the feel. Remember that props are useful and will help you create the look you want, just don't let the prop become the focal point of your photo!

Move
Don't be afraid to move or try new poses. Taking your own photographs can be so much fun if you just free yourself up to look a little silly. A trick that I got off of ANTP (Yes, I ran to Tyra when I had no idea what to do!) is to laugh out loud to get a natural look to your face you might feel silly doing it, but it will make look natural easier. Another trick for me is to put my tongue to the roof of my mouth when I smile, doing this helps me keep my neck relaxed and also hasn't let me down in created a genuine smile. New poses can be fun, so don't be afraid to try new things to keep the lines of the photo interesting. Switching things up regularly will help breath life into your photos.
Mistakes Happen!
Don't freak out if you don't do well your very first photo shoot and even if you are a seasoned veteran like me, you won't always be perfect and it could be 200 shots later that you FINALLY get into the groove. Taking photos is supposed to be fun and mistakes happen alllll the time! I love to have my husband photograph me because not only does it cut down on the time that I have take photos, but I always have more fun and laugh a lot more. Here are some of our outtakes that I wanted to share with you to prove that even if you know what to do mistakes happen!


Time
One way to NOT get frustrated when you take photos is to make sure to block off enough TIME so that you can take your time and figure out what you are doing. I usually pick a morning or early afternoon that I have nothing going on so that I don't have to worry about being on schedule. Sometimes I take up to 400 photos over 2 hours when I am photographing by myself, guhhhhhh! Really long sessions can leave me pretty tired and they aren't the regular, but they can happen. I have gotten really good at taking photos and now that I have a system I can be done with photos in 45 min to an hour, but it is important to be patient and make the time to go slow and relax when you do your own photos. 

Stay True To Yourself
Make sure to stay true to the vision that you have for your photos. Don't let anyone else get in the way of the type of photos that you want to take and mastering how to take your own photos is definitely the route to keeping complete creative control over what you do. Before I took my own photos I had a few friends that would graciously swing by and help me out, and even though they had the best intentions I was often left with photos that weren't quite what I wanted. Taking my own photos has given me the freedom to do as I please and I notice that my photos are more creative, happy, and better composed as a result.


I hope this blog post about how to take your photos with confidence was helpful to anyone that wants to get started on doing their own photography. If you have any questions that I might be able to answer, please let me know and I will do my best to help! Have a great day and I hope you enjoyed the blog post because I know I had fun putting it together and sharing what I have learned with all of you. What a great blog challenge!

Wednesday, April 17, 2013

Kiwi & Aloe Smoothie

Today I am going to share my newest smoothie creation and it's a drink that I feel is absolutely perfect for spring! Before moving to South Korea I knew about aloe juice, but I had never really paid it much attention. What a mistake!!! I LOVE aloe juice and thankfully it's really popular in South Korea and can always be found in any convenience store or sidewalk stand. Upon discovering my love for aloe juice I also rediscovered how much I enjoy kiwis!! While out in the city I got a really great deal on about half a dozen or so ripe kiwis for around 2 bucks yesterday and I instantly knew that I had to figure out how to make a green smoothie in honor of the warming weather.

I really love this smoothie because it isn't too thick and is more of a juice, and it's tartness from the kiwis is so refreshing! If you prefer a thicker smoothie I would try tossing in a frozen banana or maybe yogurt.

The great thing about this smoothie is that is is really light and delicious and so SIMPLE! You only need 3 ingredients and a blender. How great is that?

Ingredients:
1 cup of ice
1 cup of Aloe juice
2 kiwis


1. Peel the kiwis with a paring knife. Make sure to cut the ends off first before attempting to slice off the skin so that you can get a solid base to make skinning the kiwi a breeze.

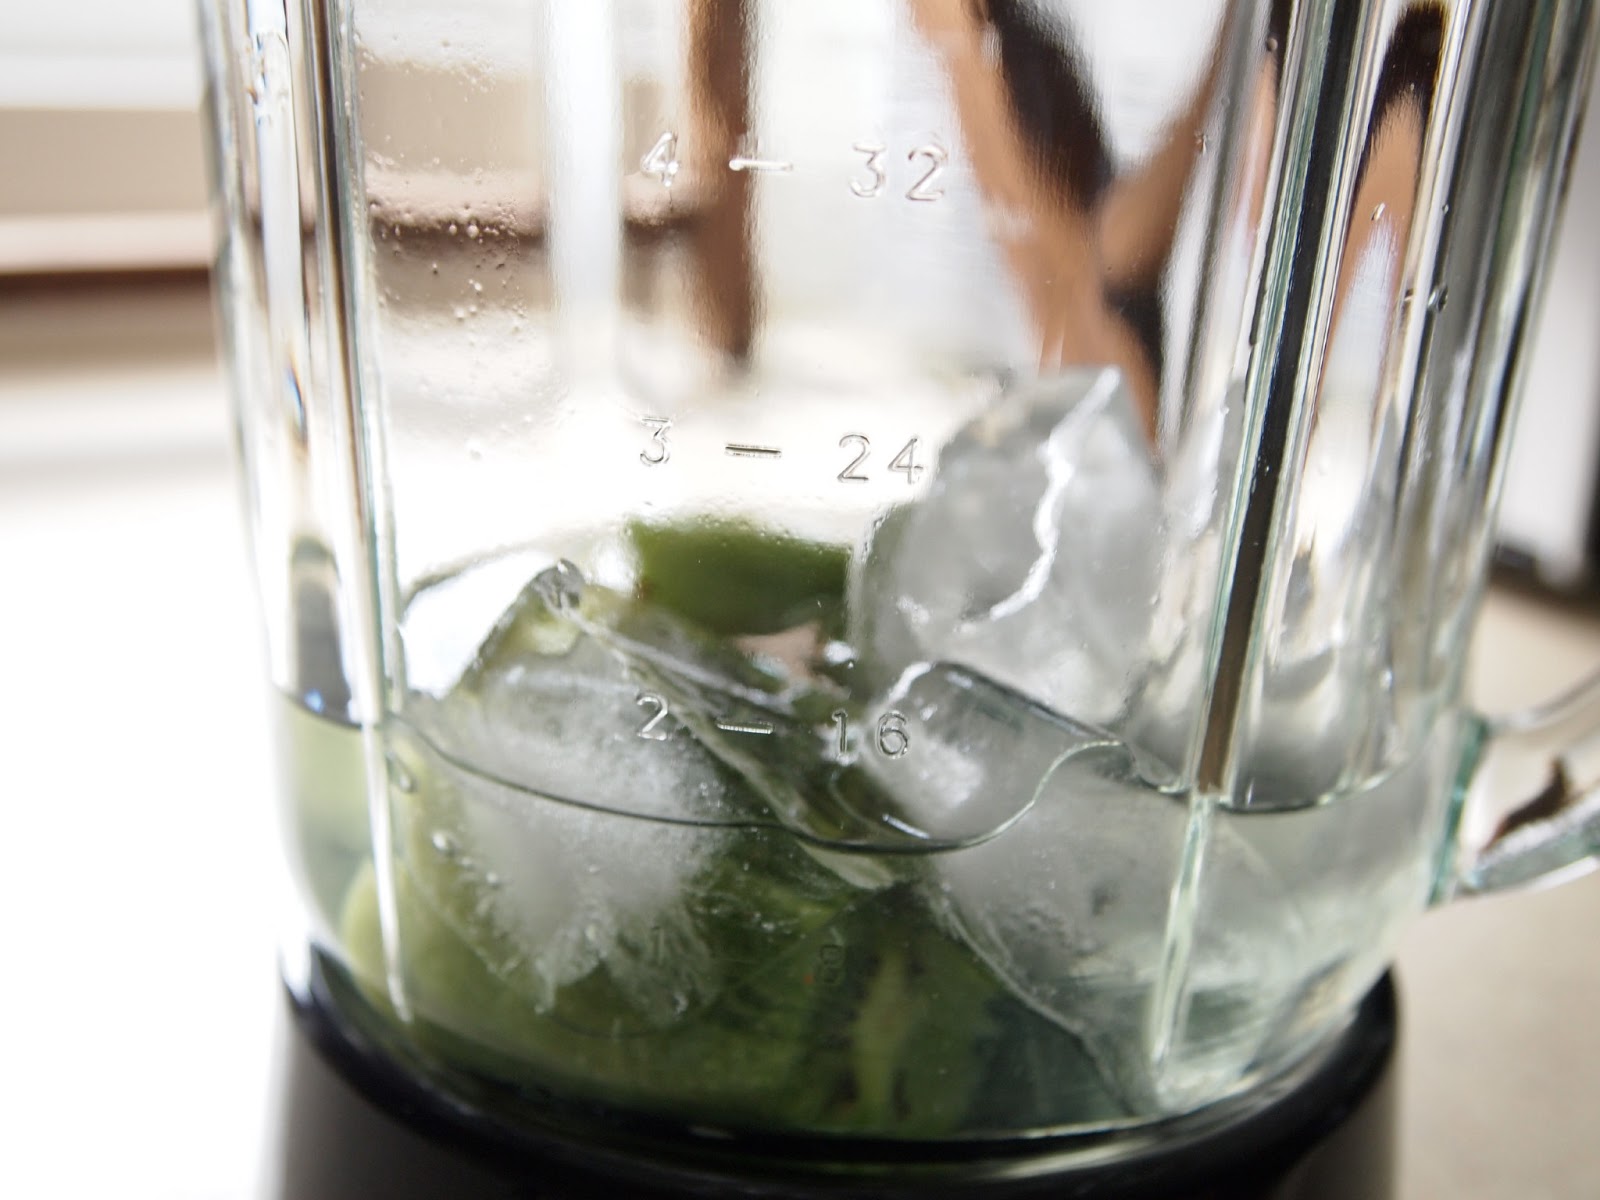
2. Put ice, kiwis, and aloe juice into blender and make some magic.

3. Pour and enjoy!

Nutrition:
Fat: .67g
Carbohydrates: 45.6g
Fiber: 5.14
Protein: 1.48
WW+ points: 3 pts +

Makes one serving.

I hope you enjoy my creation and let me know what you think! What are some of your favorite smoothie recipes?


Sunday, April 14, 2013

DIY: Wire Wine Charms

Whenever I get a care package from back home I am always beyond excited about what amazing little goodies might be inside. I have wonderful friends who take the time to put heartfelt and sweet surprises in every box that never fail to make me smile. The big surprise in my last care package was a set of homemade wine charms that my friend KT made with her own two little hands! You might remember KT from her guest outfit post, which you can find, here.

KT and I met in college and after one anthropology class we fell into an easy friendship that I am pretty sure will last until we are a pair of old crotchety, but fabulous women. When KT and I first met she didn't have a crafty bone in her body, but she has certainly turned that around within the last few months, and I have been reaping the benefits! Crafty friends are the best!!


KT's gift is perfect for me because I love throwing parties and sometimes it can be difficult to keep every guest's drink straight so these wine charms are the perfect solution! Just slip one of these little babies on your chosen wine glass and you are sure to remember which drink is yours. :)

What you need:
Needle-nose Pliers
24 guage wire
Beads or Charms of your choosing

Step 1: Cut wire into an approx. 2 inch piece

Step 2: Use the pliers to create a hook on one end and shape wire into a circle

Step 3: Add beads to wire and create a hook at the end of wire 

Step 4: Fasten hooks together for a pretty charm!

I am so in love with these charms and I can't wait to throw another dinner party so that I can show them off to my friends in Seoul. Every time I see them I think of KT and all the great times we had over a box of wine (yes, I said BOX) so using them is the perfect way to keep one of my best friends in my everyday life even when shes halfway around the world.

This KT. Isn't she ADORABLE?! I know I would totally read what this lady had to say about fashion even if I didn't know her.
PS: I am trying to get KT to finally get her blog started because she is such an amazing writer, fashionista, and now all around crafty lady. Any comments that can be added to my regular whining about her unpublished blog would be appreciated because she even has a few posts done and ready to go! How many of you bloggers were apprehensive about starting your blog and what made you decide to take the plunge and get started? What thoughts and inspiration would you share with someone about to begin their own blog?


Monday, April 1, 2013

Take Your Measurements

Today we are going to go over how to take proper body measurements, and I am beyond excited about this blog post! I have a small vintage shop on etsy, Seoul Sold, and I never fail to get questions about the fit or how to take proper measurements. I got so many questions about achieving the perfect fit that I decided to share how I went about measuring the clothes in my shop.

Initially, I grew interested in mastering the skill of measuring because of moving to South Korea, where there are untold amounts of pretty clothing, but you are usually not allowed to try ANYTHING on before you buy it. Not being allowed to try clothes on before a purchase is a nerve racking ordeal especially when you are not used to judging how the clothes will fit your body. Thankfully with a bit of practice and an inexpensive tape measure I am well armed in the Korean clothing stores.

When I look at a piece of clothing there are a few major categories that I initially assess and they are:
Everything else is just details because if these 4 major areas don't fit then the clothing item goes back on the rack! Non-negotiable! I have to be this strict because I am quite the clothes lover, but I once had a closet full of ALMOST right clothing. I have vowed to never again have a lackluster closet plus I save money and feel good about being thrifty. Hooray!

I got the body diagram from Modcloth, and you can find it, here.


Here's how you do it:

Bust: Measure from the fullest part of your bust and around your back.
Flat Measurement: Measure from armpit to armpit and double for the total measurement.

Waist: Find the smallest part of your waist, this is your natural waist and measure from there. I repeat find the smallest part of your waist above your belly button. The small of your waist is generally 2-3 inches above your waist.
Flat Measurement: Find the smallest part of the garment's waist and measure from end to end, double for total measurement.

Hips: Find the fullest part of your bottom and measure from there around your hips.
Flat Measurement: Look for the fullest part of the garment below the waist and measure from end to end, double for full measurement.

Length: Measure from the top of your shoulder to the bottom of the garment.
Flat Measurement: Measure from the top of of the garment's shoulder to its bottom.

Ever since I took a little bit of time to get acquainted with my tape measure I can honestly say that my understanding of my body and how to properly dress it has grown by untold amounts. In fact, I have grown so comfortable with measuring that I can even eyeball clothing with great accuracy, which is an invaluable skill in South Korea where you are often not allowed to try on clothing at all!

I hope this post helps you understand how to get the most out of your tape measure and achieving your perfect fit and closet.

Have a wonderful day and and keep shining bright all you beauties!


Saturday, March 30, 2013

Orange Banana Smoothie


I will be sharing a smoothie recipe which takes my current fruit obsession to a whole new level! Lately, I have been obsessed with oranges and cannot seem to get enough of the sweet citrus treat, and this morning I was hankering for a new way to enjoy the fruit. I turned to my blender and thought for a few minutes while surveying the contents of my fridge before whipping up this simple, healthy, and yummy smoothie.


What you need:
1/4 cup Milk (I used Lactaid milk because of my lactose intolerance, but real milk would work just as well. Also, if you are lactose intolerant like me, but prefer soy milk I am certain that it would be just as delicious)
1/2 tsp vanilla
1 medium orange, peeled and quartered
1 frozen banana (I used a frozen banana because I wanted to add creaminess to the smoothie and wanted to avoid ice to keep the flavor from being watered down)


Directions:

Get your blender handy and get ready to make smoothie magic!

Put all ingredients into blender and blend until smooth.

Pour smoothie and enjoy!

Makes one serving

Nutrition:
Fat: .54g
Carbs: 56.21g
Fiber: 6.18g
Protein: 10.51g

Weight Watchers Points+: 5pts

Have a wonderful day and I hope that y'all enjoy this healthy treat when you want to shake up your morning routine! It tastes almost like an orange creamsicle, which makes this smoothie a winner for welcoming spring.